What is IIF?
IIF stands for Intuit Interchange Format — a plain, tab-delimited text file that QuickBooks Desktop reads to import data. PayPunch generates aTIMEACT (time activity) record for each approved shift, so the hours land in
QuickBooks already attributed to the right employee, customer (the client
company), and payroll item.
Before you export
Approve the time entries
Only approved entries are exported. Review and approve hours first on the
Time Entries page — unapproved entries are silently
skipped.
Make sure shifts are closed
Entries must have a clock-out. Open shifts aren’t included; force-clock-out
any stuck entries first.
Generate the file
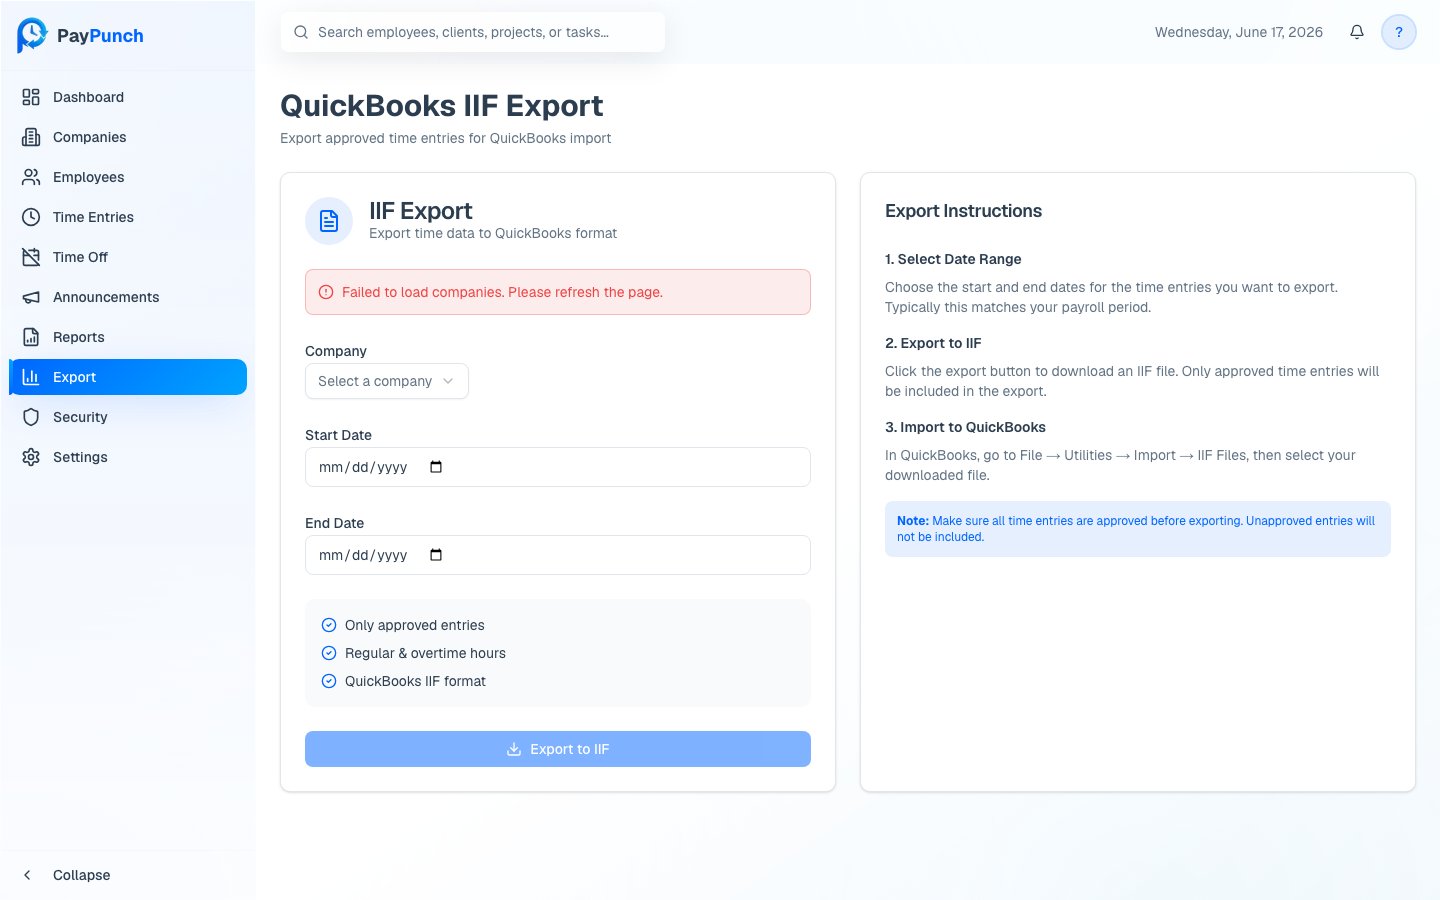
Open the export page
Go to QuickBooks IIF Export (the Export page). You’ll see an IIF
Export form alongside step-by-step Export Instructions.
Select the company
Choose the client Company to export. (If you manage just one company, it’s
selected for you.)
By default, exporting marks those entries as exported so they won’t be
double-counted in a future export. Entries already exported are excluded unless
you explicitly include them.
What the file contains
PayPunch writes one tab-delimited header row followed by oneTIMEACT row per
block of hours. The header is:
| IIF column | Comes from | Notes |
|---|---|---|
| DATE | The shift’s clock-in date | Formatted MM/DD/YYYY |
| JOB | The client company name | The QuickBooks customer/job |
| EMP | Employee name | Written as Last, First |
| ITEM | Employee’s QuickBooks payroll item | Defaults to Hourly Wages |
| PITEM | Employee’s QuickBooks payroll item | Defaults to Regular Pay |
| DURATION | Hours worked | Formatted HH:MM |
| NOTE | Job code, task code, and entry notes | Combined into one note |
Import into QuickBooks Desktop
Emailing the IIF to a payroll location
Beyond downloading, PayPunch can generate the IIF and email it straight to a payroll location’s inbox. The company must have a location assigned (or you supply a valid location code —rr, na, sa, or gt). Sending the file
records it against the pay period and payroll submission and advances the
submission toward In QuickBooks.
A preview option is also available to check the entry count and totals for a
date range before generating the file — useful for confirming a period is
complete.
Related
Approve time entries
Approve hours so they’re eligible to export.
Payroll workflow
Where the export fits in the full cycle.