> ## Documentation Index
> Fetch the complete documentation index at: https://docs.paypunch.io/llms.txt
> Use this file to discover all available pages before exploring further.
# QuickBooks IIF Export
> Export approved time entries to a QuickBooks Desktop IIF file — the flagship PayPunch feature — and import them into QuickBooks.
The **IIF export** is the payoff at the end of every payroll cycle: it turns your
approved time entries into a file QuickBooks Desktop can import directly — no
manual re-keying. This is the single biggest time-saver PayPunch gives bookkeepers.
**IIF is the PayPunch payoff.** Approved hours export straight to a QuickBooks
Desktop `.IIF` file — no manual re-keying. This is what saves bookkeepers
30–40% of payroll processing time. See the [IIF Export walkthrough](/admin/iif-export).
 ## What is IIF?
**IIF** stands for **Intuit Interchange Format** — a plain, tab-delimited text
file that QuickBooks Desktop reads to import data. PayPunch generates a
`TIMEACT` (time activity) record for each approved shift, so the hours land in
QuickBooks already attributed to the right employee, customer (the client
company), and payroll item.
## Before you export
Only **approved** entries are exported. Review and approve hours first on the
[Time Entries](/admin/time-entries) page — unapproved entries are silently
skipped.
Entries must have a **clock-out**. Open shifts aren't included; force-clock-out
any stuck entries first.
Each employee's QuickBooks payroll item drives the **ITEM** / **PITEM**
columns. Where it's blank, PayPunch falls back to sensible defaults (below).
## Generate the file
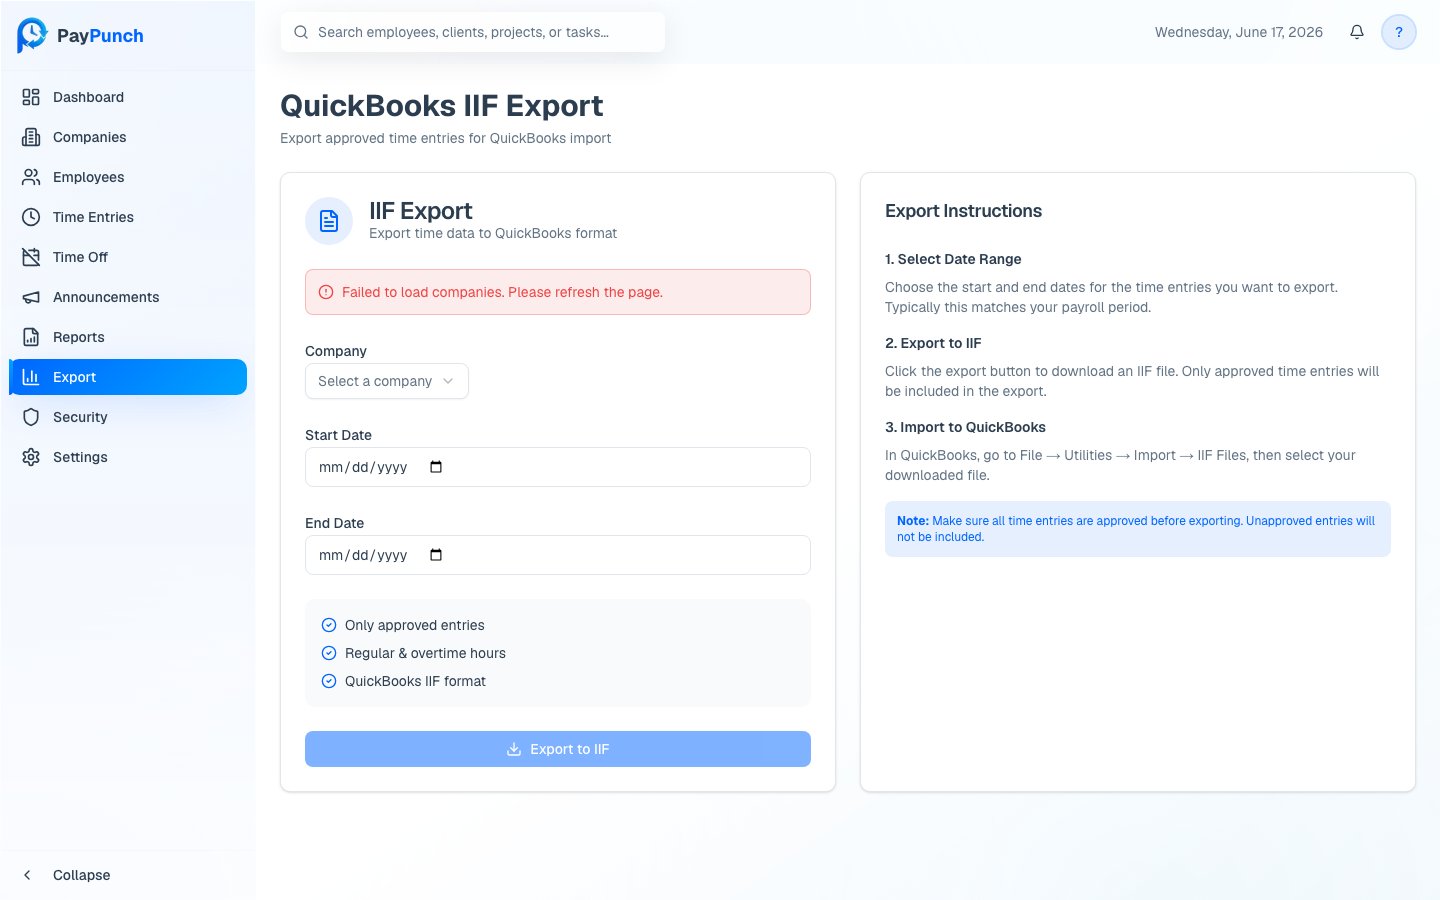
Go to **QuickBooks IIF Export** (the **Export** page). You'll see an **IIF
Export** form alongside step-by-step **Export Instructions**.
Choose the client **Company** to export. (If you manage just one company, it's
selected for you.)
Set the **Start Date** and **End Date** — typically your payroll period.
Click **Export to IIF**. The summary confirms what's included: **only approved
entries**, **regular & overtime hours**, in **QuickBooks IIF format**. Your
browser downloads a file named like
`paypunch_{company}_{start}_to_{end}.iif`.
By default, exporting **marks those entries as exported** so they won't be
double-counted in a future export. Entries already exported are excluded unless
you explicitly include them.
## What the file contains
PayPunch writes one tab-delimited header row followed by one `TIMEACT` row per
block of hours. The header is:
```
!TIMEACT DATE JOB EMP ITEM PITEM DURATION NOTE
```
Each field maps from PayPunch as follows:
| IIF column | Comes from | Notes |
| ------------ | ------------------------------------ | --------------------------- |
| **DATE** | The shift's clock-in date | Formatted `MM/DD/YYYY` |
| **JOB** | The client company name | The QuickBooks customer/job |
| **EMP** | Employee name | Written as `Last, First` |
| **ITEM** | Employee's QuickBooks payroll item | Defaults to `Hourly Wages` |
| **PITEM** | Employee's QuickBooks payroll item | Defaults to `Regular Pay` |
| **DURATION** | Hours worked | Formatted `HH:MM` |
| **NOTE** | Job code, task code, and entry notes | Combined into one note |
**Overtime is split onto its own line.** Regular hours export with the regular
payroll item; overtime hours export as a separate `TIMEACT` row using an
**“… - OT”** payroll item (or `Overtime Pay` by default) and a `(OT)` note, so
QuickBooks can apply the correct rate.
## Import into QuickBooks Desktop
In QuickBooks, go to **File → Utilities → Import → IIF Files**.
Choose the `.iif` file PayPunch downloaded.
QuickBooks imports the time activities. Review them under your timesheets /
payroll as usual.
Always confirm **every entry is approved** before exporting — unapproved entries
are not included, and a re-export only picks up entries that haven't been exported
yet. If an export returns *"No approved time entries found,"* check the date range
and that the period's entries are approved and clocked out.
## Emailing the IIF to a payroll location
Beyond downloading, PayPunch can **generate the IIF and email it** straight to a
payroll location's inbox. The company must have a **location** assigned (or you
supply a valid location code — `rr`, `na`, `sa`, or `gt`). Sending the file
records it against the pay period and payroll submission and advances the
submission toward **In QuickBooks**.
A **preview** option is also available to check the entry count and totals for a
date range **before** generating the file — useful for confirming a period is
complete.
## Related
Approve hours so they're eligible to export.
Where the export fits in the full cycle.
## What is IIF?
**IIF** stands for **Intuit Interchange Format** — a plain, tab-delimited text
file that QuickBooks Desktop reads to import data. PayPunch generates a
`TIMEACT` (time activity) record for each approved shift, so the hours land in
QuickBooks already attributed to the right employee, customer (the client
company), and payroll item.
## Before you export
Only **approved** entries are exported. Review and approve hours first on the
[Time Entries](/admin/time-entries) page — unapproved entries are silently
skipped.
Entries must have a **clock-out**. Open shifts aren't included; force-clock-out
any stuck entries first.
Each employee's QuickBooks payroll item drives the **ITEM** / **PITEM**
columns. Where it's blank, PayPunch falls back to sensible defaults (below).
## Generate the file
Go to **QuickBooks IIF Export** (the **Export** page). You'll see an **IIF
Export** form alongside step-by-step **Export Instructions**.
Choose the client **Company** to export. (If you manage just one company, it's
selected for you.)
Set the **Start Date** and **End Date** — typically your payroll period.
Click **Export to IIF**. The summary confirms what's included: **only approved
entries**, **regular & overtime hours**, in **QuickBooks IIF format**. Your
browser downloads a file named like
`paypunch_{company}_{start}_to_{end}.iif`.
By default, exporting **marks those entries as exported** so they won't be
double-counted in a future export. Entries already exported are excluded unless
you explicitly include them.
## What the file contains
PayPunch writes one tab-delimited header row followed by one `TIMEACT` row per
block of hours. The header is:
```
!TIMEACT DATE JOB EMP ITEM PITEM DURATION NOTE
```
Each field maps from PayPunch as follows:
| IIF column | Comes from | Notes |
| ------------ | ------------------------------------ | --------------------------- |
| **DATE** | The shift's clock-in date | Formatted `MM/DD/YYYY` |
| **JOB** | The client company name | The QuickBooks customer/job |
| **EMP** | Employee name | Written as `Last, First` |
| **ITEM** | Employee's QuickBooks payroll item | Defaults to `Hourly Wages` |
| **PITEM** | Employee's QuickBooks payroll item | Defaults to `Regular Pay` |
| **DURATION** | Hours worked | Formatted `HH:MM` |
| **NOTE** | Job code, task code, and entry notes | Combined into one note |
**Overtime is split onto its own line.** Regular hours export with the regular
payroll item; overtime hours export as a separate `TIMEACT` row using an
**“… - OT”** payroll item (or `Overtime Pay` by default) and a `(OT)` note, so
QuickBooks can apply the correct rate.
## Import into QuickBooks Desktop
In QuickBooks, go to **File → Utilities → Import → IIF Files**.
Choose the `.iif` file PayPunch downloaded.
QuickBooks imports the time activities. Review them under your timesheets /
payroll as usual.
Always confirm **every entry is approved** before exporting — unapproved entries
are not included, and a re-export only picks up entries that haven't been exported
yet. If an export returns *"No approved time entries found,"* check the date range
and that the period's entries are approved and clocked out.
## Emailing the IIF to a payroll location
Beyond downloading, PayPunch can **generate the IIF and email it** straight to a
payroll location's inbox. The company must have a **location** assigned (or you
supply a valid location code — `rr`, `na`, `sa`, or `gt`). Sending the file
records it against the pay period and payroll submission and advances the
submission toward **In QuickBooks**.
A **preview** option is also available to check the entry count and totals for a
date range **before** generating the file — useful for confirming a period is
complete.
## Related
Approve hours so they're eligible to export.
Where the export fits in the full cycle.