> ## Documentation Index
> Fetch the complete documentation index at: https://docs.paypunch.io/llms.txt
> Use this file to discover all available pages before exploring further.
# Client Companies
> Add and manage the client companies you collect payroll data for.
A **client company** is one of the businesses your bookkeeping organization
serves. Each company has its own employees, job codes, time entries, and payroll.
Everything else in PayPunch hangs off the companies you create here.
 ## The Companies page
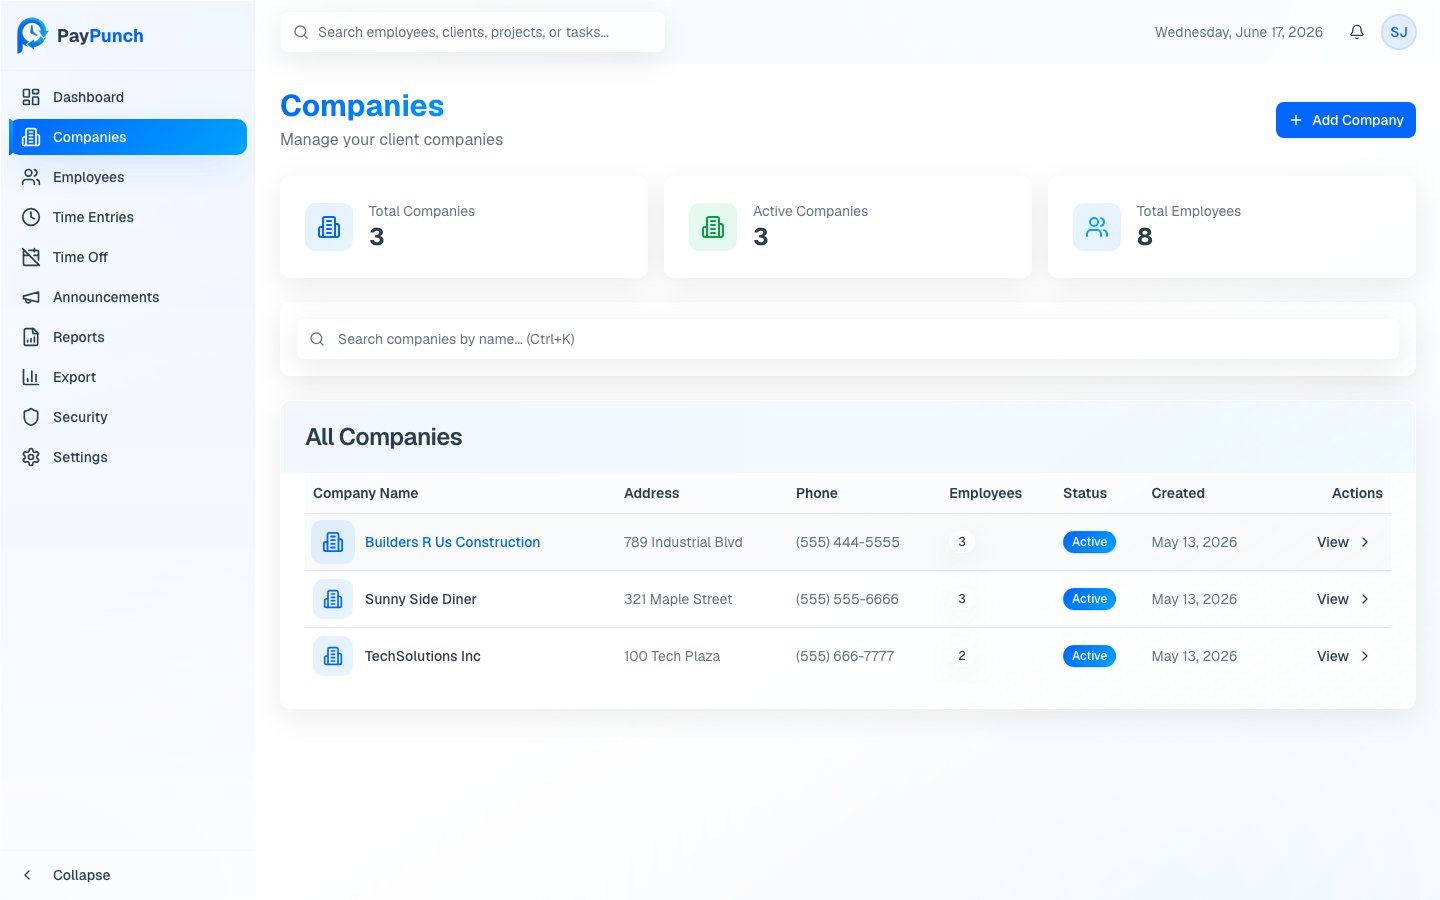
Open **Companies** from the sidebar. At the top you'll see three summary cards —
**Total Companies**, **Active Companies**, and **Total Employees** — followed by
a searchable table of every company.
The table lists **Company Name**, **Address**, **Phone**, **Employees**,
**Status** (Active or Inactive), and **Created** date. Click any row, or the
**View** button, to open that company's detail page.
Press Ctrl+K (or Cmd+K) to jump
straight to the search box, then type to filter companies by name.
## Add a company
Click **Add Company** in the top-right corner.
Enter the **Company Name** (required). Optionally add an **Address**,
**Phone**, and choose an **Industry** from the dropdown.
Click **Create Company**. The new company appears in the table immediately.
Only **Company Name** is required. You can fill in the address, phone, and
industry later from the company's detail page.
## View company details
From a company's detail page you can review its profile and employees, and reach
the company's **Job Codes**. See [Job Codes](/admin/job-codes) to set up cost
codes for a company.
## Active vs. inactive
The **Status** badge shows whether a company is **Active** or **Inactive**.
Inactive companies are not actively managed or billed, but their historical data
is preserved. Use the search and the status column to keep your active client
list focused.
## Where to go next
Add cost and project codes per company.
Build the company's employee roster.
## The Companies page
Open **Companies** from the sidebar. At the top you'll see three summary cards —
**Total Companies**, **Active Companies**, and **Total Employees** — followed by
a searchable table of every company.
The table lists **Company Name**, **Address**, **Phone**, **Employees**,
**Status** (Active or Inactive), and **Created** date. Click any row, or the
**View** button, to open that company's detail page.
Press Ctrl+K (or Cmd+K) to jump
straight to the search box, then type to filter companies by name.
## Add a company
Click **Add Company** in the top-right corner.
Enter the **Company Name** (required). Optionally add an **Address**,
**Phone**, and choose an **Industry** from the dropdown.
Click **Create Company**. The new company appears in the table immediately.
Only **Company Name** is required. You can fill in the address, phone, and
industry later from the company's detail page.
## View company details
From a company's detail page you can review its profile and employees, and reach
the company's **Job Codes**. See [Job Codes](/admin/job-codes) to set up cost
codes for a company.
## Active vs. inactive
The **Status** badge shows whether a company is **Active** or **Inactive**.
Inactive companies are not actively managed or billed, but their historical data
is preserved. Use the search and the status column to keep your active client
list focused.
## Where to go next
Add cost and project codes per company.
Build the company's employee roster.